HARD EDGE Lighters
If your Hard Edge lighter is having trouble lighting it is time for a little loving care and maintenance.
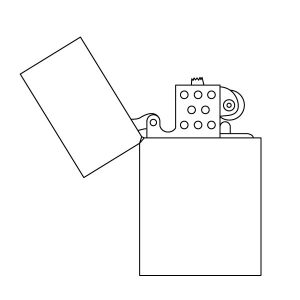
Step 1. IGNITION
Open the cap and turn the wheel outward.

– Never expose the cap to the flame (except to snuff it out). The cap may overheat and melt.
– Make sure the cap is fully open before operating. Always use the lighter upright. Never use upside down.
– Avoid impact as this may cause cracking and affect performance.

Step 2. FLINT
Remember that flints are consumables and need replacing at regular intervals!

– Make sure that the length of flint is sufficient to produce sparks. If not, replace the flint with a new one.
– The wheel will grind down the rivet if there is no flint installed or it has worn down from use (If the rivet makes direct contact with the wheel).


If you are having difficulty turning the wheel, please note the flint is stiff when new — directly after purchase, installing a new flint, or accidentally misaligned inside. In these cases please try following:
1. Take out the flint and put it back in.
2. Turn the wheel backwards a few times.
Step 3. FILLING
Now make sure there is sufficient lighter fluid. If the cotton wadding appears white add a small amount of lighter fluid and stop then repeat this process until the cotton wadding has a slight grey appearance. This indicates that it has sufficient fluid.
After filling, wipe lighter and hands dry before igniting.

Step 4. WICK
Make sure that the wick is protruding from the top of the flame wind guard (See diagram below). If the wick is below the flame guard, using a pair of pliers grasp the wick and pull slowly until the desired length is obtained.
Step 5. CLEANING WHEEL
Make sure that the flint wheel is free of debris. This can be done by using a small brush to clean the wheel. An old tooth brush works well for this purpose!
Your Hard Edge should be ready!